MIDAS and ETABS models
The Viewer reads MIDAS models and the results MIDAS exported or wrote, and shows them the way MIDAS does. It never recalculates them: every number you see came from MIDAS.
1. Open a model and its results
For the tutorial, open the sample RC office building, 8 storeys from the Welcome window: it comes with its result tables. With your own project:
- Open the model: a text file (.mct or .mgt) or a project file (.mcb, .mgb or .mgbx).
- Choose Model › Import result tables… and pick the results: tables you exported from MIDAS (Excel or text), or MIDAS's own result file (.nfxp for Civil, .GAX1 for Gen). You can also select the model and its results together in File › Open….
Exporting tables from MIDAS: open a result table in MIDAS (for example Results › Result Tables › Beam › Force), right-click it and export it to Excel. Export as many tables as you like; the Viewer recognises each one from its headings.
2. Read the model tree
The Explorer's Model tab is ordered like MIDAS's Works tree: Structures (stories, nodes, elements by type), Properties (materials, sections, thicknesses), Boundaries, Masses, Static loads, construction stages, Groups and Model check.
- Click an item to select it and see its properties; the search box above the tree finds any item by name.
- Use Model › Colour by to colour the model by section, material, group or element type, and Model › Colour key for the key.
- Model › Frames as lines draws members as thin lines instead of their real sections — useful in dense models.
- Model › Loads shows the loads of a case on the model.
- Model check at the bottom of the tree lists anything that looks wrong; here it says no problems.
3. Modes and periods
Open the Explorer's Results tab. Natural periods lists each mode with its period and frequency; Periods chart plots them.
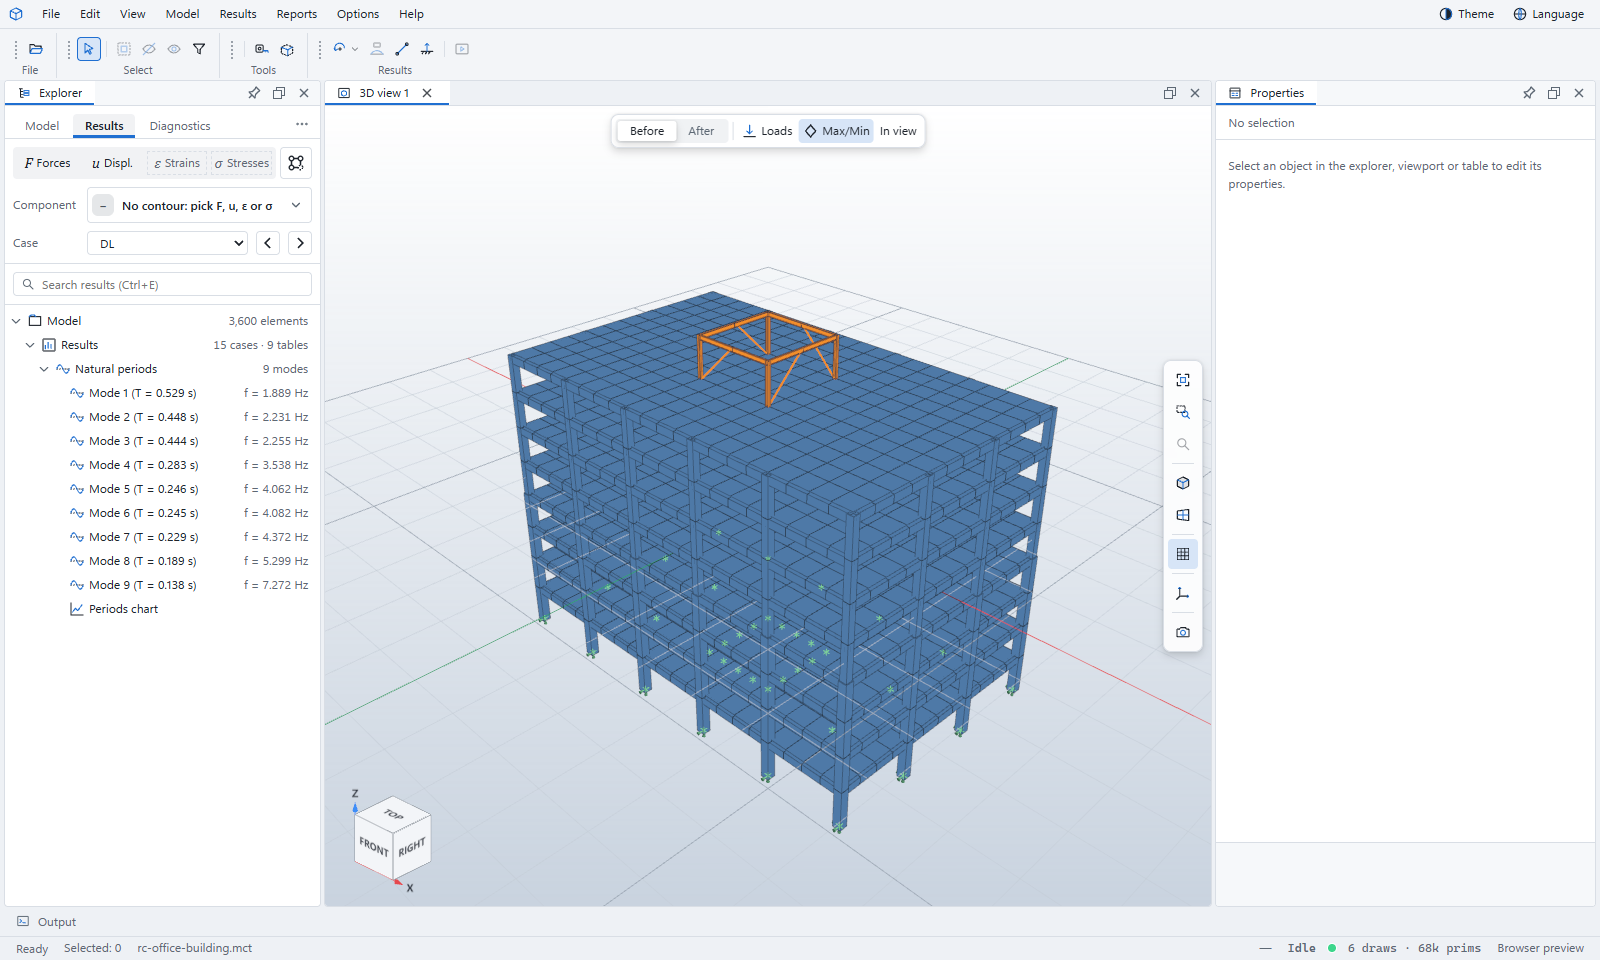
- Click Mode 1 to show its shape, then After in the strip at the top of the 3D view.
- Choose Results › Play (or the play button on the toolbar) to animate it.
4. Member forces and reactions
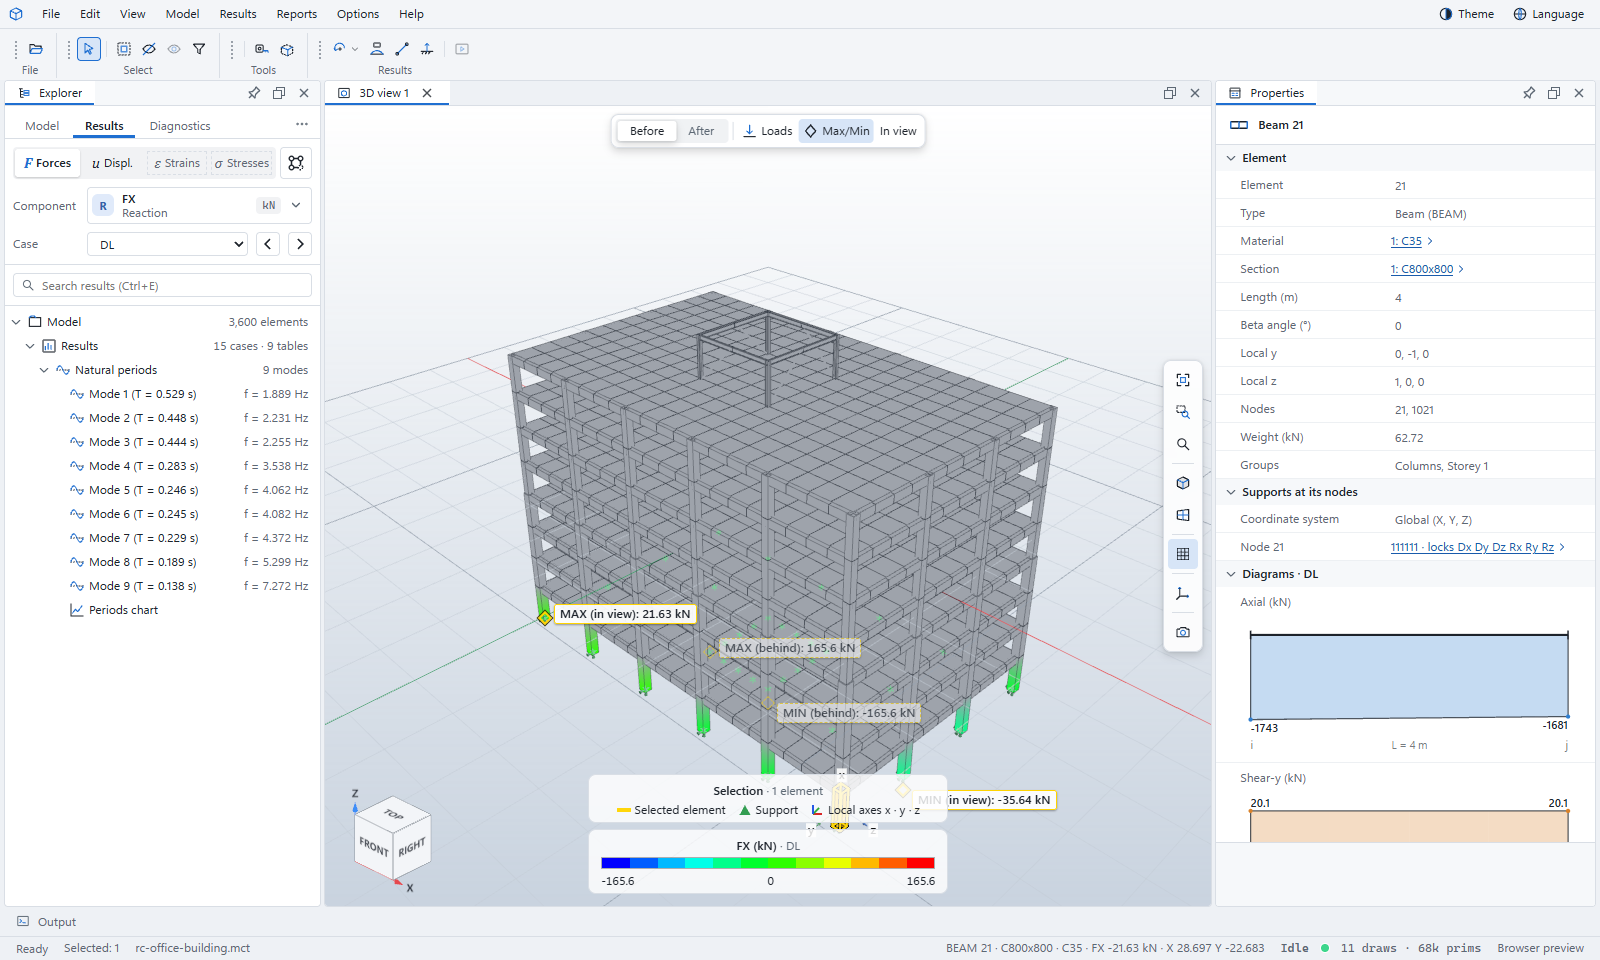
- Click F Forces in the results header. Choose the Component — reactions, beam forces, plate forces — and the Case.
- Turn on Results › Member force to draw the force diagram along the members, and Results › Show values to label each member's ends and peak.
- Click a member. Properties shows its section, material, length, local axes, groups and supports, and a diagram of each force for the case shown, with the values at both ends.
5. Tables, charts and the analysis log
- Reports › Member values opens the result values as a table you can sort and export.
- Reports › Charts plots the curves read from your tables, such as time histories.
- Reports › Open analysis log… reads the log MIDAS wrote beside the model (the .out file): its warnings and errors with their nodes, the total weight and the time log.
6. Bridges: stages, moving loads and tendons
Open PSC box girder bridge, 40 + 60 + 40 m. Construction stages appear in the Model tree and in the Case list, before the post-construction cases. Step through the stages with ‹ and › to watch the bridge being built.
7. ETABS models
Open an ETABS text file: the .e2k you export from ETABS (File › Export › ETABS .e2k Text File), or the .$et backup ETABS keeps beside the .EDB. The Viewer shows the stories, frames, walls and floors, sections, load patterns and combinations, with each object named the way ETABS names it (for example B66 @ L01).
ETABS result tables are not read yet.
Good to know
- In the web Viewer, MIDAS and ETABS files are read on our server and discarded straight after; nothing is stored. The desktop app reads them on your computer.
- Text files saved in Korean, Chinese or Japanese code pages are recognised automatically.
- Every value is shown with its unit, taken from the model and the tables.