Your first model
This tutorial opens one of the samples that come with the Viewer and walks you through the window. Open the Viewer in another tab and follow along.
Open a sample
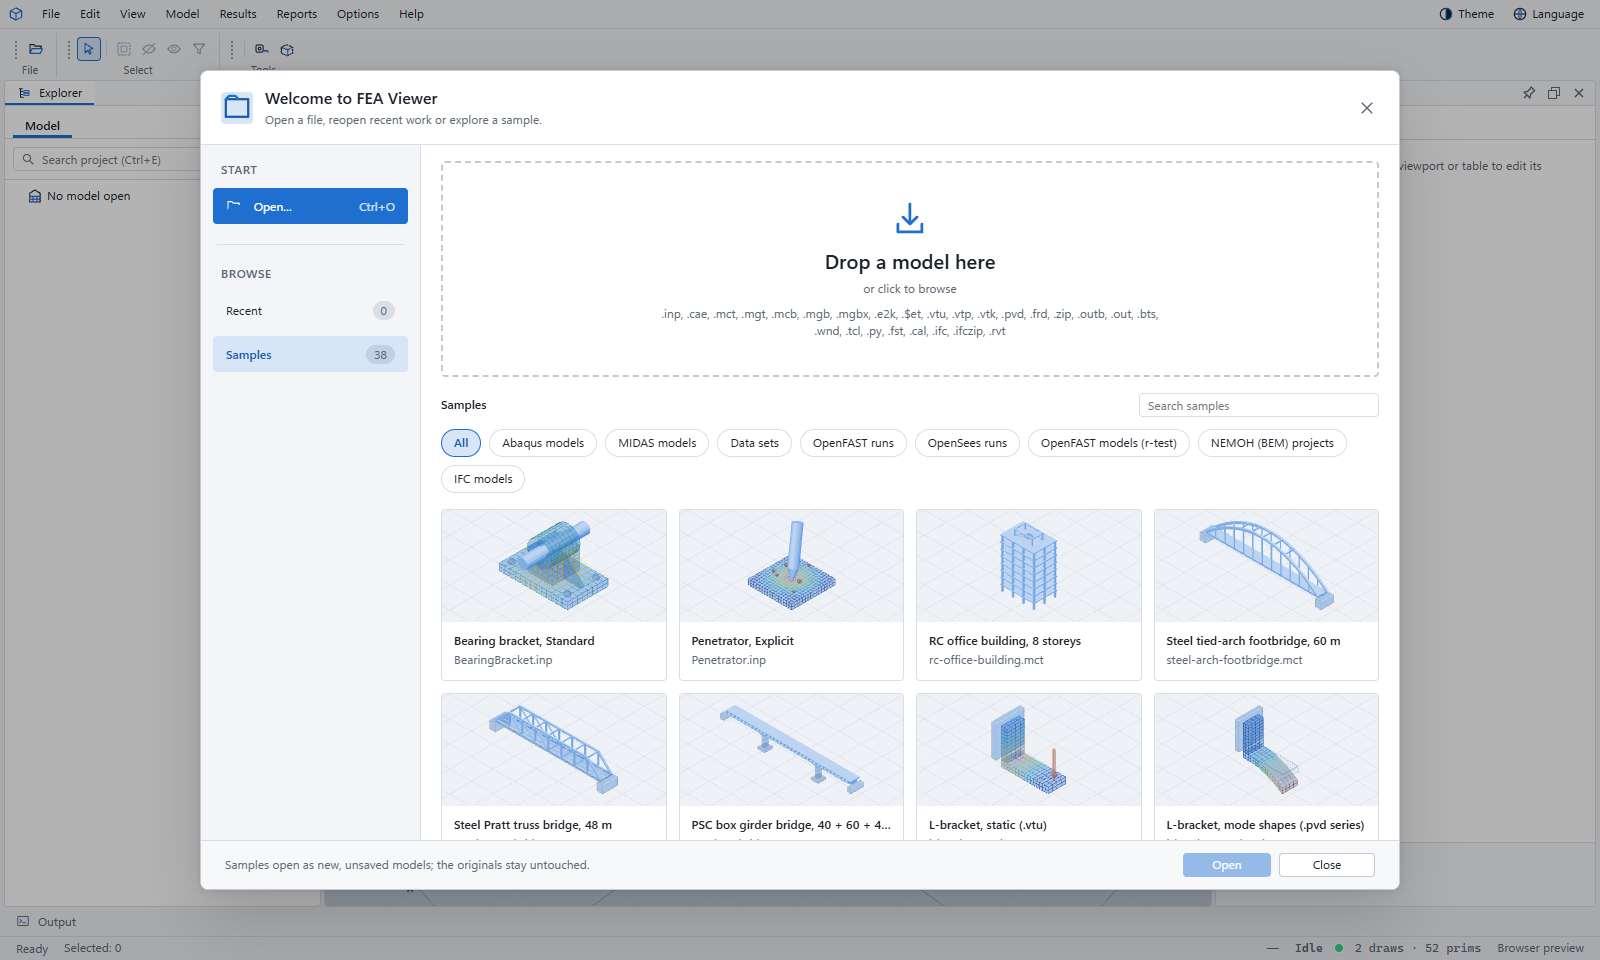
When the Viewer opens, it shows the Welcome window. You can drop a file on it, choose Open…, reopen a recent file, or try a sample.
- Choose Samples on the left. The samples are grouped by program; the chips above them filter the list.
- Double-click RC office building, 8 storeys. (Or click it once, then Open.)
Find your way around
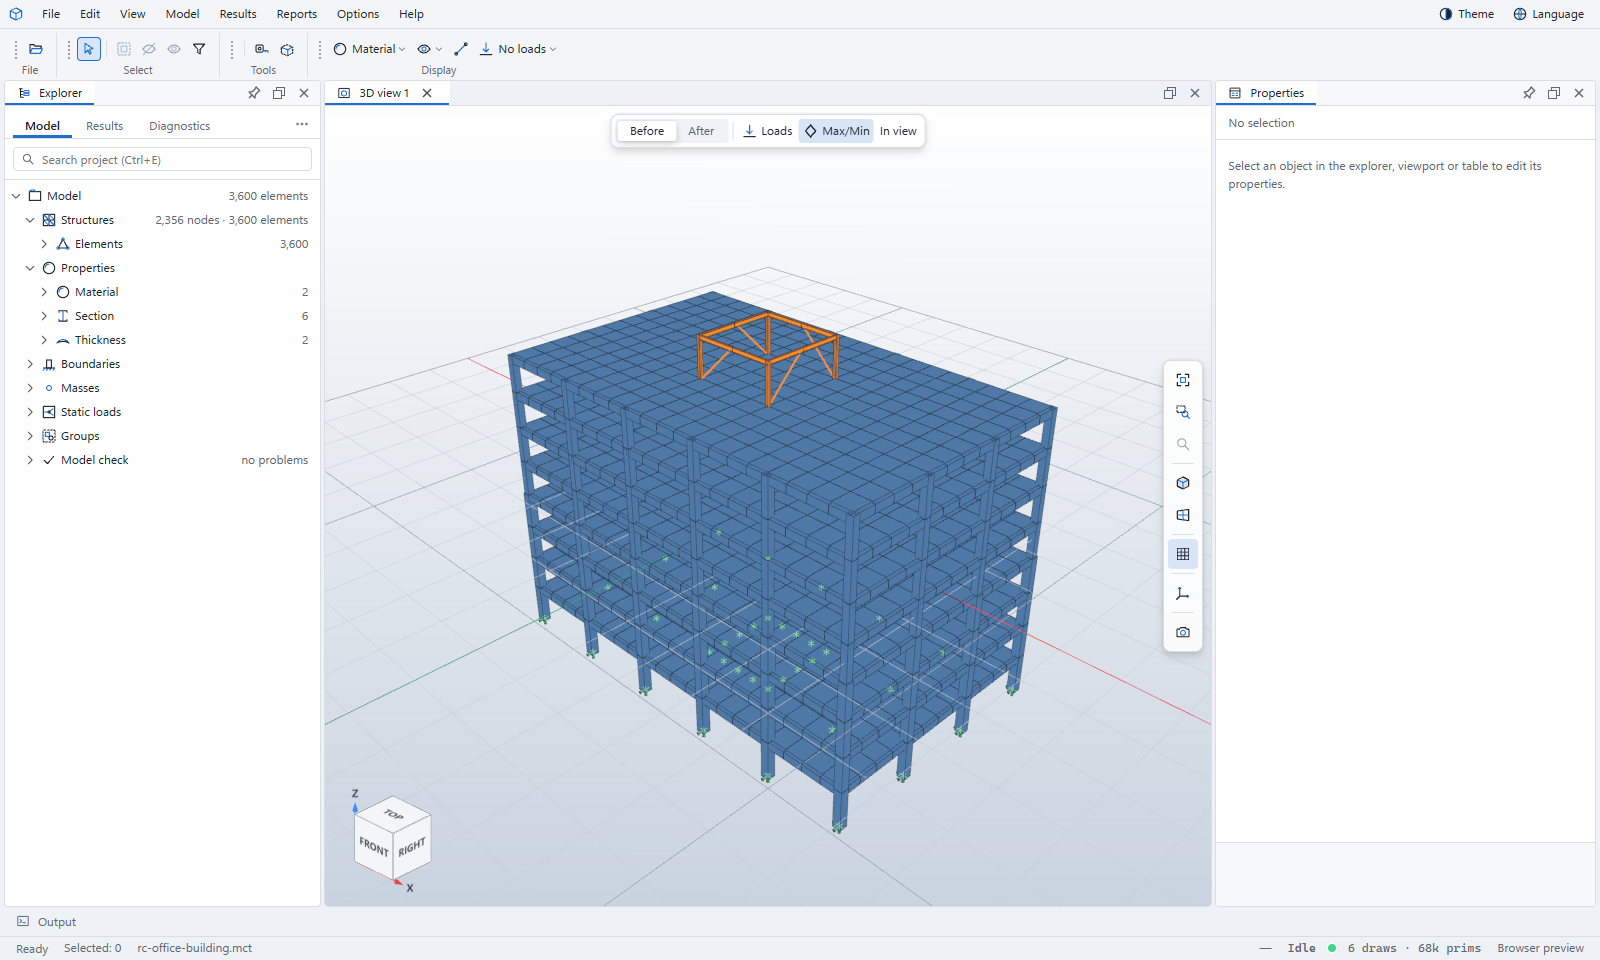
- Menus and toolbars run along the top. The toolbars show only what fits the file you opened.
- The Explorer (left) lists the model. Its Model tab follows the program the file came from — here, MIDAS's own tree: structures, properties, boundaries, masses, loads and groups. Results and Diagnostics are next to it.
- The 3D view (middle) has a strip of result controls at the top, camera buttons down the right edge and the view cube at the bottom left.
- Properties (right) shows whatever you select.
- The status bar (bottom) shows the file name and what you selected.
Turn the model
| Orbit | Drag with the left mouse button. The model turns about the point under the cursor. |
|---|---|
| Pan | Drag with the right or middle button. |
| Zoom | Turn the wheel. It zooms towards the cursor. |
| Fit everything | Press F. |
| Standard views | Click a face, edge or corner of the view cube, or press 0 (isometric), 1 (front), 7 (top) or 3 (right). |
Select something
- Click a column. It is outlined, and Properties lists its section, material, nodes and length.
- Ctrl+click adds to the selection. Shift+drag selects with a box.
- Press Esc to clear the selection.
Show a result
- In the Explorer, open the Results tab.
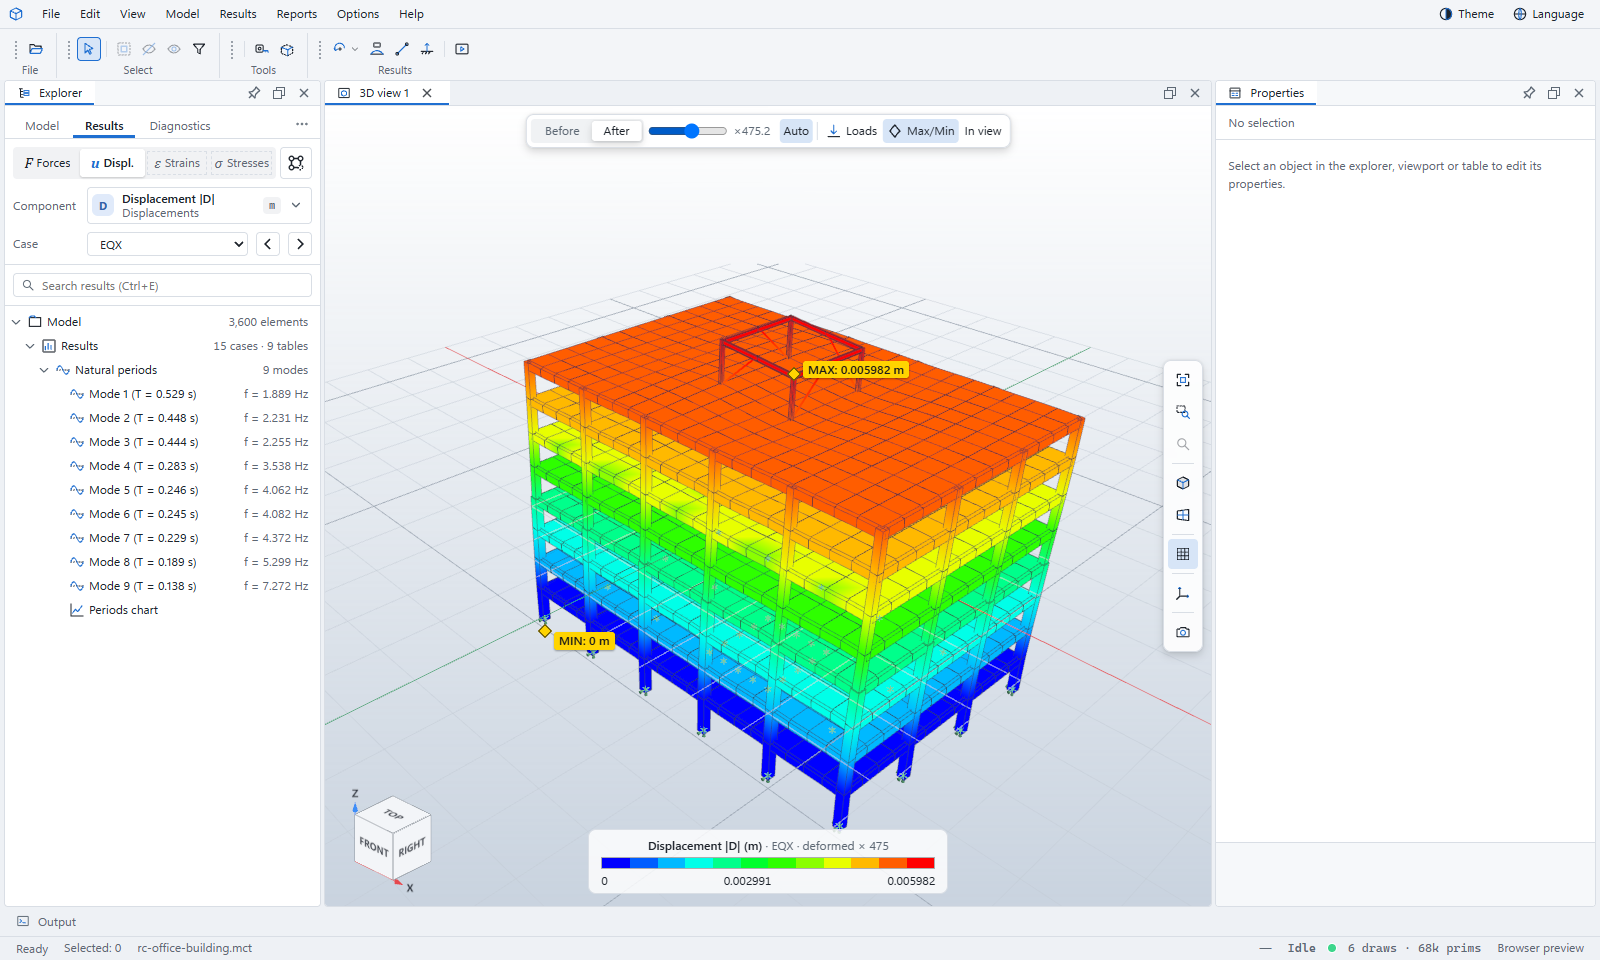
- Click u Displ. in the row of result families (forces, displacements, strains, stresses). The model is coloured by displacement, and a colour key appears at the bottom of the 3D view.
- In Case, choose EQX (the earthquake load in X). The ‹ and › buttons step through the cases.
- In the strip at the top of the 3D view, click After to see the building deformed. The slider sets the scale; Auto picks one for you.
Open your own file
Drag a file from your folder onto the Viewer, or use File › Open… (Ctrl+O). You can select several files at once — a model and its results, say — or open a whole folder or a .zip. Opening a file closes the one before it.
The formats page lists every file type. Continue with the tutorial for your program.